Prep Time: 20 minutes
Cook Time: 5 minutes
Ingredients:
3 cups chopped fresh strawberries
1 cup sugar
1 envelope unflavored gelatin
1 (8 ounce) container strawberry or raspberry yogurt
1/2 cup heavy cream
2 Tbsp. lemon juice
pinch salt
Preparation:Place strawberries in medium freezer proof bowl and sprinkle sugar over. Let stand for 15 minutes, then drain off juice and place juice in small saucepan.
Add unflavored gelatin to juice and let stand for 2 minutes. Then cook over medium-low heat, stirring frequently, until gelatin is dissolved and mixture is smooth. Coarsely mash strawberries in bowl.
Pour juice mixture over strawberries in bowl and add yogurt, cream, lemon juice, and salt. Mix well, then cover and freeze for 2 hours.
Remove mixture from freezer and beat on medium speed until smooth. Cover bowl and return to freezer. Freeze yogurt for 6 hours. Remove from freezer 15-20 minutes before serving, then scoop into bowls. Serves 6
Monday, August 25, 2008

Homemade Frozen Strawberry Yogurt
Prep Time: 20 minutes
Cook Time: 5 minutes
Ingredients:
3 cups chopped fresh strawberries
1 cup sugar
1 envelope unflavored gelatin
1 (8 ounce) container strawberry or raspberry yogurt
1/2 cup heavy cream
2 Tbsp. lemon juice
pinch salt
Preparation:Place strawberries in medium freezer proof bowl and sprinkle sugar over. Let stand for 15 minutes, then drain off juice and place juice in small saucepan.
Add unflavored gelatin to juice and let stand for 2 minutes. Then cook over medium-low heat, stirring frequently, until gelatin is dissolved and mixture is smooth. Coarsely mash strawberries in bowl.
Pour juice mixture over strawberries in bowl and add yogurt, cream, lemon juice, and salt. Mix well, then cover and freeze for 2 hours.
Remove mixture from freezer and beat on medium speed until smooth. Cover bowl and return to freezer. Freeze yogurt for 6 hours. Remove from freezer 15-20 minutes before serving, then scoop into bowls. Serves 6
Tuesday, August 19, 2008
Baked eggplant with white miso
served 4
65 ml mirin
50ml sake150g white miso paste
75g sugar
8 japanese eggplants
Preheat the oven to 180C
Bring the mirin and sake to a simmer and cook for 1 min to burn off the alcohol from the sake. Turn down the heat and add the miso paste. whisk to dissolve, then add the sugar. cook brieftly , stirring, until the sugar had dissolved. removed from the heat and allow to cool
Meanwhile, slie the eggplants lengthways. over a moderate hear, pan-fly the eggplant halves in a little oil unitl golden. transfer to an over tray and arrange snugly, cut side up. backe in the oven until cooked through (about 5 min) remove from the oven and evenly spread 1 tbsp of the cooled miso mixture on top of each piece. place under a salamander or grill and cook until the eggplant starts to blister and caramelise. serve immediately
Sunday, May 18, 2008
Savory Char Hor Fun
Ingredients
White Chinese Noodles
1 Chicken Breasts - sliced into strips
2 SquidsSquids
 - cut into slices
20 Medium sized PrawnsPrawns

1 Fish CakeFish Cake
 - cut into slices
1 cup Chicken Stock
2 Garlic ClovesGarlic Cloves
 - chopped
2 cups Water
1 EggsEggs
 - beaten
2 tbsp Light Soy Sauce
2 tbsp Oil
1 ScallionScallion
 - chopped
Spinach or your preferred green vegetable
Salt to taste
Pepper to taste
Sliced pickled Green ChiliGreen Chili
 - to serve on side
Directions
1] Put 1 tbsp of oil into wok and stir fry 1/2 of the chopped garlic.
2] Add noddles and coat with light soy sauce.
3] Remove from wok and unto serving dish.
4] Place the rest of the oil into wok and stir fry the rest of the garlic.
5] Add 1 cup of chicken broth, then 2 cups water. (add more water if you prefer a watery mixture)
6] Add slices of chicken breasts.
7] Add prawns, slices of fish cakes and squid.
8] Boil till everything is cooked.
9] Add in spinach.
10] Bring everything to a boil again then turn off heat.
11] Stir in egg.
12] Add in salt and pepper for taste.
13] Pour soup over noodles.
14] Garnish with green onions.
15] Serve immediately with pickled green chilies.
Note:
- If its possible, use chinese cabbagechinese cabbage
 instead of spinach.
- You can substitute the green chilies with Jalepeno peppers.
White Chinese Noodles
1 Chicken Breasts - sliced into strips
2 SquidsSquids
- cut into slices20 Medium sized PrawnsPrawns
1 Fish CakeFish Cake
- cut into slices1 cup Chicken Stock
2 Garlic ClovesGarlic Cloves
- chopped2 cups Water
1 EggsEggs
- beaten2 tbsp Light Soy Sauce
2 tbsp Oil
1 ScallionScallion
- choppedSpinach or your preferred green vegetable
Salt to taste
Pepper to taste
Sliced pickled Green ChiliGreen Chili
- to serve on sideDirections
1] Put 1 tbsp of oil into wok and stir fry 1/2 of the chopped garlic.
2] Add noddles and coat with light soy sauce.
3] Remove from wok and unto serving dish.
4] Place the rest of the oil into wok and stir fry the rest of the garlic.
5] Add 1 cup of chicken broth, then 2 cups water. (add more water if you prefer a watery mixture)
6] Add slices of chicken breasts.
7] Add prawns, slices of fish cakes and squid.
8] Boil till everything is cooked.
9] Add in spinach.
10] Bring everything to a boil again then turn off heat.
11] Stir in egg.
12] Add in salt and pepper for taste.
13] Pour soup over noodles.
14] Garnish with green onions.
15] Serve immediately with pickled green chilies.
Note:
- If its possible, use chinese cabbagechinese cabbage
instead of spinach.- You can substitute the green chilies with Jalepeno peppers.
Tuesday, May 13, 2008
Crème Brûlée (serves eight)
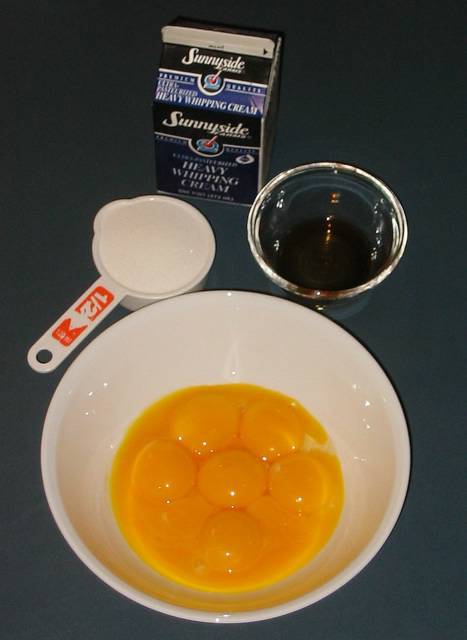
The ingredients needed are (clockwise from top) 2 cups heavy cream, 1/2 teaspoon vanilla extract, 8 large egg yolks, and 1/2 cup sugar.

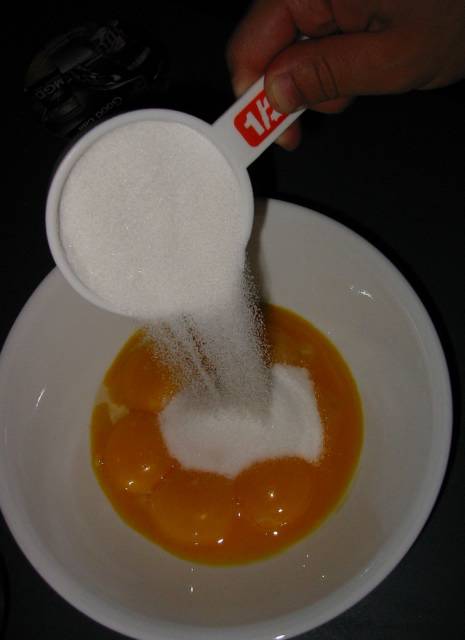
First pour the sugar into the egg yolks.

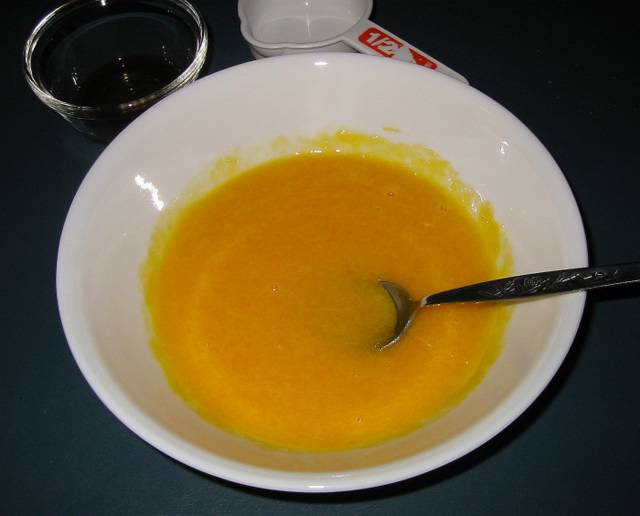
Beat the yolks until smooth.

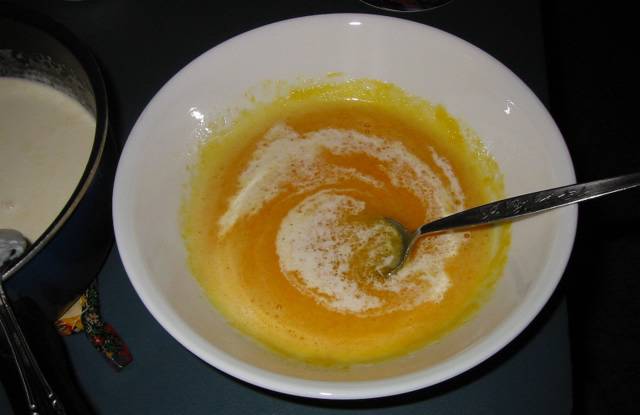
Heat the heavy cream until almost simmering (you can bring to a simmer and let cool a minute). Add heavy cream to the egg yolks on tablespoon at a time while stirring vigorously. This will temper the eggs so as to not curdle them (or make scrambled eggs) when exposed to the heat of the heavy cream.

When about 1/4 cup of heavy cream has been integrated into the yolks, pour the yolks into the heavy cream and mix until smooth.

Now, use a fine mesh sieve and strain the custard mixture to remove and small clumps that may remain the mixture. This step will help ensure a silky texture to the custard. Blend in the vanilla extract after the mixture has been strained.

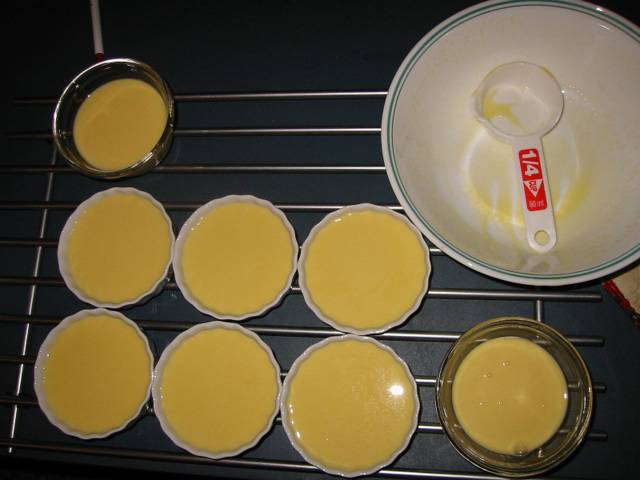
Pour the mixture into six to eight ramekins depending on size. (Makes a little more than eight four ounce creme brulees.) In the picture below, I filled six four ounce ramekins and two six ounce ramekins (the six ouncers were not full).

Place the ramekins in a baking pan. Pour boiling water into the pan (be careful not to get water into the ramekins), so that the water level is halfway up the sides of the ramekins. Cooking the custards in a water bath will provide a low even temperature for the custards to cook evenly and set properly. Place in an oven preheated to 250?F for about one hour.

After an hour, check to see if the custards are done. We want them to be set on the outside edge, but jiggly (like jello) at the center. The easiest way to do this is to take a pair of tongs with food grade rubber bands wrapped around the ends to help grip the ramekins. Pick up a ramekin and shake to see if the centers jiggle. If the only the center jiggles a little, it's done. If the whole thing is set, remove immediately - it'll be a little over done, but still delicious. If it's not done, just put it back in the water bath and check again in ten minutes. Once the custards are done, let them cool on a cooling rack to room temperature. This will let the custards finish cooking the centers on their own.

Wrap in plastic wrap and refrigerate for at least eight hours before serving.
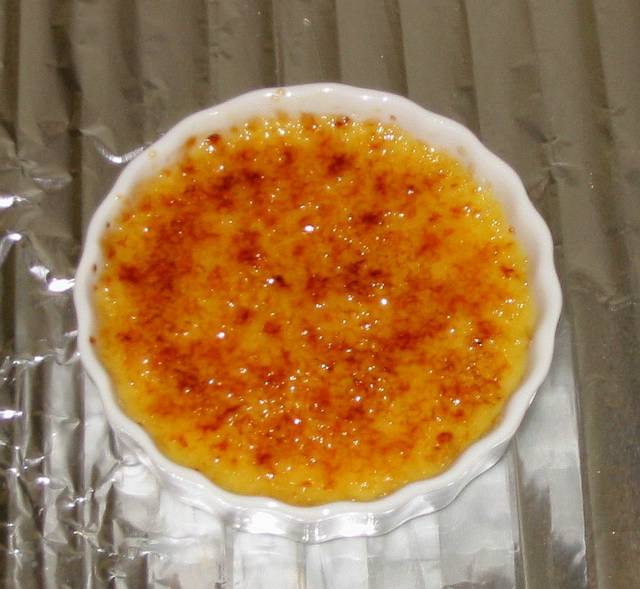
About an hour before serving, remove the plastic wrap from each ramekin and use a paper towel to gently soak up any moisture that may be extruded from the custard tops. Pour about a teaspoon of turbinado (sugar in the raw) sugar in the middle of each custard. Gently tilt the ramekin and let gravity and gently shaking move the sugar around until the top surface of the custard is covered evenly with turbinado sugar. Using a kitchen butane torch, propane blow torch, or welding torch (whatever strong open flame you've got lying around), heat the sugar until it bubbles and changes color. With a small butane torch, I take my time and don't move from one side of the creme brulee to the other until the spot I've been working on has achieved the brown color that I want. This takes a little over a minute for each creme brulee. (The process is faster with a larger torch.) Don't worry about heating up the custard underneath, we'll refrigerate the creme brulee for a bit before serving. Do worry about lighting your kitchen counter on fire. I usually place the ramekin on a piece of aluminum foil placed over a cooling rack.
Once you're done scorching your cream, place the ramekins back in the refrigerator for about 45 minutes. The caramel will still be hard, but if you wait too much longer, the sugar will start to soften and dissolve into the custard.

First pour the sugar into the egg yolks.
Beat the yolks until smooth.
Heat the heavy cream until almost simmering (you can bring to a simmer and let cool a minute). Add heavy cream to the egg yolks on tablespoon at a time while stirring vigorously. This will temper the eggs so as to not curdle them (or make scrambled eggs) when exposed to the heat of the heavy cream.
When about 1/4 cup of heavy cream has been integrated into the yolks, pour the yolks into the heavy cream and mix until smooth.
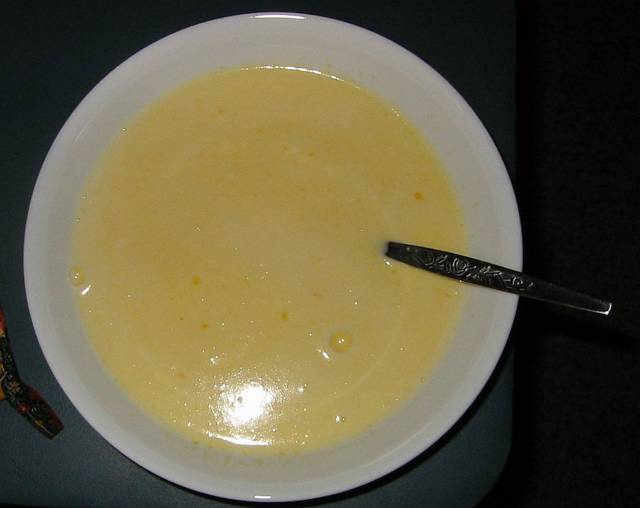
Now, use a fine mesh sieve and strain the custard mixture to remove and small clumps that may remain the mixture. This step will help ensure a silky texture to the custard. Blend in the vanilla extract after the mixture has been strained.
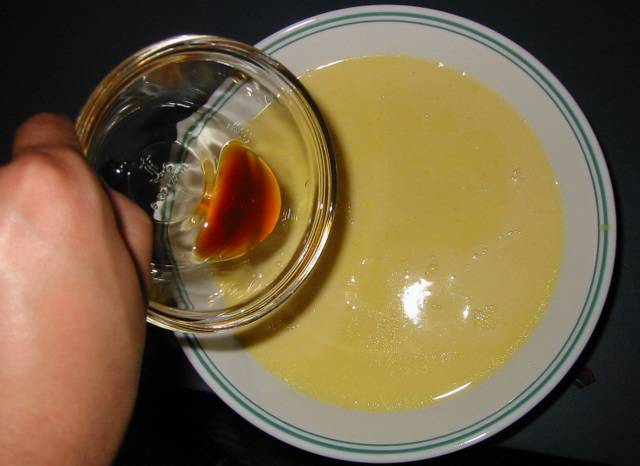
Pour the mixture into six to eight ramekins depending on size. (Makes a little more than eight four ounce creme brulees.) In the picture below, I filled six four ounce ramekins and two six ounce ramekins (the six ouncers were not full).
Place the ramekins in a baking pan. Pour boiling water into the pan (be careful not to get water into the ramekins), so that the water level is halfway up the sides of the ramekins. Cooking the custards in a water bath will provide a low even temperature for the custards to cook evenly and set properly. Place in an oven preheated to 250?F for about one hour.

After an hour, check to see if the custards are done. We want them to be set on the outside edge, but jiggly (like jello) at the center. The easiest way to do this is to take a pair of tongs with food grade rubber bands wrapped around the ends to help grip the ramekins. Pick up a ramekin and shake to see if the centers jiggle. If the only the center jiggles a little, it's done. If the whole thing is set, remove immediately - it'll be a little over done, but still delicious. If it's not done, just put it back in the water bath and check again in ten minutes. Once the custards are done, let them cool on a cooling rack to room temperature. This will let the custards finish cooking the centers on their own.
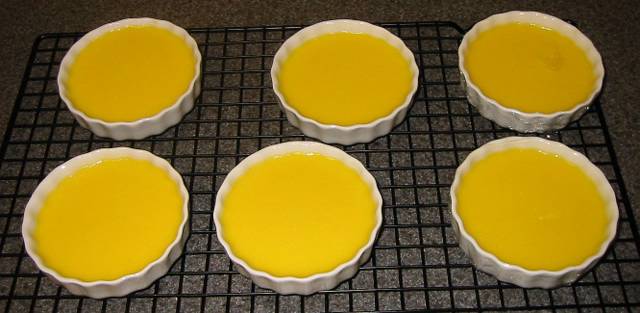
Wrap in plastic wrap and refrigerate for at least eight hours before serving.
About an hour before serving, remove the plastic wrap from each ramekin and use a paper towel to gently soak up any moisture that may be extruded from the custard tops. Pour about a teaspoon of turbinado (sugar in the raw) sugar in the middle of each custard. Gently tilt the ramekin and let gravity and gently shaking move the sugar around until the top surface of the custard is covered evenly with turbinado sugar. Using a kitchen butane torch, propane blow torch, or welding torch (whatever strong open flame you've got lying around), heat the sugar until it bubbles and changes color. With a small butane torch, I take my time and don't move from one side of the creme brulee to the other until the spot I've been working on has achieved the brown color that I want. This takes a little over a minute for each creme brulee. (The process is faster with a larger torch.) Don't worry about heating up the custard underneath, we'll refrigerate the creme brulee for a bit before serving. Do worry about lighting your kitchen counter on fire. I usually place the ramekin on a piece of aluminum foil placed over a cooling rack.
Once you're done scorching your cream, place the ramekins back in the refrigerator for about 45 minutes. The caramel will still be hard, but if you wait too much longer, the sugar will start to soften and dissolve into the custard.
Hot milk cake
is a traditional two-layer cake, possibly from the Mid-Atlantic States. It can be frosted with mocha icing.
Hot milk cake can be fabulous, but the recipe is not for the timid. Expect a couple attempts that fail to rise before getting it right. Beating the eggs very well is important.
[edit] Ingredients
- 1 c (240 ml) whole milk
- ½ cup (120 ml) butter
- 1 t (5 ml) vanilla extract
- 2 cups (480 ml) cake flour [or, 4 T (60 ml) cornstarch + enough all-purpose flour to equal 2 cups]
- 2 tsp (10 ml) baking powder
- Pinch of salt
- 4 large eggs
- 2 cups (480 ml) sugar
[edit] Procedure
- An hour before baking, take eggs and butter out of the refrigerator to reach room temperature.
- Heat together milk and butter until butter melts. Cool to just warm.
- Add vanilla.
- If you sift the flour, do so after measuring. Mix dry ingredients.
- In a large bowl beat the the eggs until lemon-colored — this could take 5-10 minutes.
- Add sugar slowly, beating well.
- Add the dry ingredients.
- Add milk mixture very slowly, folding it in by hand toward the end.
- Divide the batter into 2 greased and floured 9 inch (230 mm) round cake pans.
- Bake about 30 minutes at 350 °F (175 °C).
- Cool on racks for 10 minutes (you may need to run a knife around the edge first) then turn out to cool.
- Frost with mocha icing, other icing, or with strawberries.
Thursday, May 8, 2008
vietnamese roll
The beauty of these spring rolls is that you can you just about any ingredients you like. Substitute the shrimp with fried tofu for a vegetarian version; use snow peas and crisp bean sprouts instead of the carrots and cucumbers.
ingredients
12 rice paper rounds (banh trang)
3 oz. rice vermicelli, soaked in hot water for 10 minutes, till soft
24 medium shrimp, unpeeled
1/2 small head green leaf, red leaf or romaine lettuce (about 10-12 leaves)
2 carrots
1 large cucumber
1/4 cup of any or all of the following fresh herbs: thai basil, mint, cilantro (I like to use mostly basil, with a smattering of mint in the mix, but use whatever suits your taste)
3 stalks scallions
serves 4 as light main dish, 12 as appetizer
1 Bring a pot of water to a boil and cook the unshelled shrimp till pink and opaque, around two to three minutes or so. Fish out the shrimp but keep the water boiling; add the rice noodles and cook for a minute or so. Drain and rinse in cool water.
2 Peel and slice the shrimp in half lengthwise.
3 Peel apart the lettuce leaves and slice into thin strips. Peel and julienne the carrots and cucumber; mince up the herbs and scallions.
4 You’ll need a large bowl or pan, big enough to accommodate the rice paper round. Fill with warm water, and soak one wrapper for around a minute or so, until it’s soft and pliable.


5 Lay the wrapper on a plate or other flat surface. You’ll be placing your ingredients in the bottom half of the wrapper – if this is your first time making spring rolls, it’s a good idea to start with smaller quantities.
Begin with a small handful of lettuce in the bottom third of the wrapper, and add an approximately equal amount of rice noodle. Top with a neat row of cucumbers and another neat row of carrots. Lay a row of shrimp close to the middle of the wrapper, pink side down. Sprinkle with some of the herb mixture.


| 6 Fold up the bottom, then the two sides; continue rolling up, keeping the wrapper firmly around the ingredients to get a good roll, but being careful not to tug too tightly so as to avoid tearing the wrapper. Place the roll seam side down. 7 Continue making the rolls. Unfortunately, the rolls don’t keep well, so serve them straight away*, with plenty of dipping sauce. If you’re serving them as an appetizer, you can cut the rolls in half using a sharp knife. *If you absolutely must make them ahead of time, place them in an airtight container lined with damp towel and store at cool room temperature, not in the fridge. These will keep for an hour or two. |    |
hoisin-chili dipping sauce
Like any salad, Vietnamese spring rolls need a dressing to bring out the fresh flavors of the ingredients. This spicy-sweet sauce makes the perfect dipping sauce to accompany fresh spring rolls.
1 shallot or 1-2 cloves garlic
1/2 cup hoisin sauce
1 Tbsp. rice vinegar
1/4 cup water
2 tsps. Asian red chili paste (I use sambal oelek, but any chili paste will do)
2 Tbsp. chopped peanuts for garnish
Stir-fry the minced garlic or shallot for a minute or two, until the garlic is softened. Add the hoisin sauce, rice vinegar and water, and bring to a boil. Add chili paste to taste (about 2 tsps. generally does it for me). Remove from heat, pour in dipping bowl(s), and garnish with chopped peanut.
HOT AND SOUR PRAWN SOUP (Tom Yum Goong)
Ingredients :
| |||
Sunday, May 4, 2008
Rocket pesto
Pulse 2 cloves garlic, 2 tbsp pine nuts(toasted), 30g parmesan (grated) in food processor. add 80g baby rocket leaves, salt and pepper and pulse until smooth. add 125ml virgin olive oil in a steady stream until smooth.
Tuesday, April 8, 2008
Jam Shortbreads
ingredients
90g icing sugar
185g plain flour
60g cornflour
30g/1oz ground almonds
250g butter, cubed
a few drops almond essence
icing sugar, for dusting
jam or fruit curd of your choice, for filling
90g icing sugar
185g plain flour
60g cornflour
30g/1oz ground almonds
250g butter, cubed
a few drops almond essence
icing sugar, for dusting
jam or fruit curd of your choice, for filling
Method
1. Preheat the oven to
170C/325F/Gas 3 and grease a muffin tray.
2. Sift the sugar, flour and cornflour into a bowl and add the ground almonds. Add the butter and the almond essence and mix in until there are no lumps of butter remaining.
3. Turn the mixture onto a lightly floured surface and knead lightly to form a smooth dough. Break off small pieces of dough, roll them into balls just large enough to fill the holes in the muffin tray a third of the way up. Flatten the tops slightly with your fingers.
4. Bake for about 8-12 minutes until they are a light golden colour. Remove from the oven and, using the back of a teaspoon, make an indentation in top of each biscuit. Leave to cool, then tap the biscuits out gently (they are quite fragile when still slightly warm, so handle with care).
5. When the biscuits have cooled, dust the tops of the biscuits with icing sugar and then, using a teaspoon, fill the indentations with your chosen jam or curd filling.
Sunday, April 6, 2008
Japanese Potato Salad
- 3 medium boiling (firm) potatoes, well scrubbed
- 1 small carrot
- About 10 cm / 4 inches of a seedless cucumber
- 1 small onion
- 1 egg
- Salt and pepper
- 3/4 to 1 cup of mayonnaise, Japanese or homemade preferred (see notes above)
Boil the potatoes in their skins until tender (you can poke a skewer through one without any resistance). Boil the carrot, unpeeled, in the same pot. Boil the egg until hard boiled at the same time.
In the meantime, slice the cucumber and the onion very thinly. Sprinkle both with a little salt, and let sit for a while (10 minutes or more) until the vegetables exude their juices. Squeeze firmly to get rid of the juices.
When the potatoes and carrot are done, drain peel them while still hot (holding each in a kitchen towel to peel them helps). Cut the potatoes into small pieces, and slice the carrot. Toss with a little salt and pepper and leave to cool.
Peel the hard boiled egg and chop up finely.
When the potatoes and carrot mixture has cooled to room temperature, mix in the cucumber, onion and egg. Mix in the mayonnaise. Cover with plastic wrap and cool in the refrigerator until serving time (ideally at least one hour).
If you are bringing this to a picnic be sure to pack it in a cooler - it will keep better, and taste better chilled than at room temperature. If you are packing it in an obento box, make sure the rice and other ingredients have cooled before tucking in the salad, or carry the salad in a separate container.
Salmon Teriyaki
Salmon Teriyaki is one of the most popular dishes to be served in Japanese Restaurants, and is best eaten in the autumn when the Salmon is at its most tasty. Of course, Teriyaki is a common dish in Japan and the sauce can be used to make Beef Teriyaki, Chicken Teriyaki and Pork Teriyaki. Making the Teriyaki sauce is very easy, and it can be kept in the fridge for a month.
Ingredients - Serves 4 people
- Salmon - 4 fillets
- Water or Sake - 4 tablespoons
- Sugar - 3 and half tablespoons
- Soy sauce - 4 tablespoons
- Step 1 - Make Teriyaki sauce
In preparation, make the Teriyaki sauce by mixing the water or sake, with the sugar and soy sauce, then soak the salmon in it for 30 minutes. - Step 2 - Grill salmon
Place the salmon fillets on an oven sheet and into the oven at 220C for 5 to 10 minutes. During this time, slowly heat the Teriyaki sauce in a saucepan until it becomes more of a syrup consistency.
Tip: It is important not to boil the sauce and burn it, as this will lose the flavour and the taste will become bitter. - Step 3 - Add sauce and serve
Finally, slowly pour the Teriyaki sauce onto the grilled salmon. Salmon Teriyaki is traditionally served with rice and miso soup (please see our Tofu Miso Soup recipe).


Sunday, March 30, 2008
Classic Tuna Mornay
INGREDIENTS
250g short pasta, (we used Tortiglioni)
40g butter
3 tablespoons plain flour
1½ cups milk
1 cup cream
2 eggs, lightly beaten, optional
salt and pinch of white pepper
1 small onion, finely chopped
1 cup grated gruyere or tasty cheese
425g tuna in brine or spring-water, drained
2 tablespoons chopped parsley
½ teaspoon grated nutmeg
juice of half a lemon
1 cup breadcrumbs
30g butter, melted
1/3 cup grated parmesan
METHOD
Bring a large pot of salted water to the boil. Add pasta and cook according to packet instructions. Drain and set aside.
Preheat oven to 180°C or 160°C fan-forced. Lightly grease a 1.5 litre capacity dish.
Melt butter in a medium sized heavy based saucepan. Sprinkle over flour, and cook for about 1 minute or until the flour has lost its raw smell and smells a bit nutty. Gradually whisk in milk and cream. Bring to a boil, stirring until slightly thickened.
Remove from heat and quickly beat in the eggs, if using. Season with salt and white pepper and stir though the onion, gruyere or tasty cheese, the drained tuna, pasta, parsley, nutmeg, and lemon juice.
Pour into prepared dish. Sprinkle with breadcrumbs and pour over melted butter. Sprinkle with the parmesan. Bake for 20 - 30 minutes or until golden. Allow to stand for 5 minutes before serving.
Monday, March 17, 2008
Beef Soup
I run out of recipe to make this soup - but fortunately I found a cookbook "secrets of the red lantern" and decide to try the recipe but i did change a few stuff here and there.
4 beef shin bones
some pork bones (it work with this - probably the same as using chicken bones)
2 tablespoon salt
350g dried ginger (did not use this)
50g cinnamon stick
12 star anise
6 cloves
230g caster sugar
160g rock salt
300ml fish sauce
ginger(cut in half and chargrilled - did not do this)
4 large onions (chargrilled in skin -did not do this)
carrots
place meat in large saucepan and cover cold water then add salt and leave 2 hours. discard water after 2 hrs. seal the beef shin on pan.
add meat to saucepan and add 1.5 l water add dried ginger, cinnamon,star anise and cloves and bring to boil then reduce to simmer for 1 hr ... add sugar,rock salt and fish sauce and simmer for 2 hr then remove beef shins ...
refridge soup overnite and add ginger and onions cook 2 hours ...(did not do this)
slice beef shin and add colainder , chili and lime - taste quite close to authentic vietnam
Monday, January 28, 2008
Teriyaki wagyu
- Olive oil
- 6 x 180g wagyu rib fillets
- 6cm knob of fresh ginger, finely sliced
- 1 large red chilli, seeded, finely sliced lengthways
- 155g (1 cup) frozen podded soy beans, thawed
- Teriyaki Marinade:
- 80ml (¿ cup) sake
- 60ml (¼ cup) mirin
- 60ml (¼ cup) dark soy sauce
- 1½ tbs caster sugar
Put the wagyu rib fillets in a wide shallow tray. Combine the ingredients for the teriyaki marinade then pour over the wagyu, turning so they are well coated. Cover and refrigerate for 1 hour.
Heat a little olive oil in a large heavy-based frying pan over high heat. Remove the wagyu from the marinade, reserving the marinade, and pat dry with paper towels. Seal the wagyu in the hot pan for 3 minutes each side, or until medium. Rest for 5 minutes before slicing.
Meanwhile, heat a little olive oil in a separate heavy-based frying pan over medium heat. Add the chilli, ginger and soybeans and saute for 2-3 minutes, then add the marinade, stirring to heat through.
To serve, thinly slice each wagyu fillet and place on serving plates. Spoon over the soy bean and teriyaki sauce.
I changed the recipe abit - don't worry about the sauce and while cooking the beef put on wasabi sauce - cook for 6 min each side.
Monday, January 21, 2008
Caramel Sauce
Ingredients
1 cup of sugar
6 Tbsp butter
1/2 cup heavy whipping cream
Method
1 First, before you begin, make sure you have everything ready to go - the cream and the butter next to the pan, ready to put in. Making caramel is a fast process that cannot wait for hunting around for ingredients. If you don't work fast, the sugar will burn. Safety first - make sure there are no children under foot and you may want to wear oven mitts; the caramelized sugar will be much hotter than boiling water.
2 Heat sugar on high heat in a heavy-bottomed 2-quart or 3-quart saucepan. As the sugar begins to melt, stir constantly with a whisk. Note that this recipe works best if you are using a thick-bottomed pan. If you find that you end up burning some of the sugar before the rest of it is melted, the next time you attempt it, add a half cup of water to the sugar at the beginning of the process, this will help the sugar to cook more evenly, though it will take longer as the water will need to evaporate before the sugar will caramelize.
3 As soon as all of the sugar crystals have melted (the liquid sugar should be dark amber in color), immediately add the butter to the pan. Continue to whisk vigorously until the butter has melted.
4 Once the butter has melted, take the pan off the heat. Count to three, then add the cream to the pan and continue to whisk to incorporate. Note than when you add the butter and the cream, the mixture will foam up considerably. This is why you must use a pan that is at least 2-quarts (preferably 3-quarts) big. (Check here for an explanation of why adding the cream makes the mixture bubble up so much.)
5 Whisk until caramel sauce is smooth. Let cool in the pan for a couple minutes, then pour into a glass mason jar and let sit to cool to room temperature. (Remember to use pot holders when handling the jar filled with hot caramel sauce.) Store in the refrigerator for up to 2 weeks. Warm before serving.banana cake
Banana Cake
125g (4 oz) softend butter
1 cup superfine sugar
¼ cup brown sugar
3 eggs
2 cups all-purpose (plain) flour
2 teaspoons baking powder
1 teaspoon ground cinnamon
¾ cup sour cream
1 cup mashed banana (approx. 2 bananas --- leave some chunks)
Preheat oven to 180ºC (350ºF) and grease a 26 cm (10 in) Bundt cake pan. Cream butter and sugars in the bowl of an electric mixer, beating until light and fluffy. Add eggs one at a time and beat well. Sift the flour, baking powder and cinnamon over the mixture. Add Sour cream and the mashed banana and stir to combine. Spoon the batter into the cake pan. Bake for 40 minutes or until a done when tested with a skewer (my cake took 55 minutes in total to bake). Cool on a wire rack.
Monday, January 14, 2008
Sticky Chicken Wings
Ingredients (serves 4)
- 1/4 cup tomato sauce
- 1/3 cup barbecue sauce
- 2 teaspoons Worcestershire sauce
- 1/4 cup brown sugar
- 2 teaspoons spicy barbecue seasoning (see note) or smoked paprika
- 12 (1kg) chicken wings, cut in half at joint
- 1kg frozen potato wedges
- Whisk tomato sauce, barbecue sauce, Worcestershire sauce, sugar, seasoning and salt and pepper in a jug.
- Place chicken in a large, shallow ceramic dish. Pour over marinade and turn to coat. Cover and refrigerate, turning occasionally, for at least 2 hours.
- Preheat oven to 200°C. Line 2 baking trays with baking paper. Place chicken in a single layer on 1 tray and potato wedges on remaining tray. Place chicken on top shelf, with potatoes underneath. Roast chicken and potatoes, turning once, for 25 to 30 minutes or until crisp and golden.
- Spicy barbecue seasoning is a blend of spices usually including black pepper, coriander and paprika. Located in the spice aisle of the supermarket.
- Hint: Marinate the wings in a sealed plastic bag. It saves fridge space and washing up!
- Serve with salad.
Yellow mole prawn tacos
Found this recipe in the Sydney morning herald - decided to try it . Turn out very good - but really I am just making a spicy curry prawn - can use rice too. But this recipe is really hot ( I had an upset stomach the whole night) or maybe just that we not used to hot stuff. I would definitely try it again but cut down on the chilli powder.
1 packet soft corn tortillas
1 1/2 cup(375ml) canola oil
1 white onion, sliced
120g fresh ginger, peeled and grated
5 cloves garlic, finally chopped
2 tbsp ground cumin
2 tbsp ground coriander
3 tbsp chilli powder
1 tsp salt
1 cup (250ml) water
24 green medium tiger prawns, peeled and cut into thirds
coriander springs, to garnish
Heat one cup of oil in a pan and cook the onion until translucent. Put onion and oil mix into a blender with ginger, garlic, spices, salt, 1/2 cup water and pulse until smooth. Combine with remaining water and cook over a low heat for five minutes or until thickened. Allow to cool.
Add the prawns, toss to combine and refrigerate two hours. Heat the remaining 1/2 cup of oil in a frying pan over medium heat. Add the prawns and marinade and cook until they turn bright orange.
Roll the prawns in a soft corn tortilla with a pico de gallo salsa - a fresh mix of diced tomato, finely diced onion, spring onion/shallots, garlic and fresh medium-heat chillies (jalapenos if you can get them).
Dress the salsa with chopped fresh coriander, a little brown sugar, lime juice and salt to taste.
Serves 8
Sunday, January 13, 2008
javanese roasted salmon and wilted spinach
Ingredients
1/2 cup (1 stick) plus 3 tablespoons unsalted butter
1 teaspoon dried crushed red pepper
1 large garlic clove, minced
1/2 cup (packed) golden brown sugar
1/2 cup fresh lime juice
1/2 cup soy sauce
2 teaspoons cornstarch dissolved in 2 teaspoons water
Preparation
reheat oven to 400°F. Melt 1/2 cup butter in heavy large saucepan over medium heat. Add crushed red pepper and garlic and stir until fragrant, about 1 minute. Add sugar; whisk until mixture is melted and smooth and begins to bubble, about 4 minutes. Whisk in lime juice and soy sauce. Increase heat and boil until reduced to 1 1/2 cups, about 2 minutes. Add cornstarch mixture and boil until thick, about 3 minutes. Set sauce aside.
Did not used the spinach.
1/2 cup (1 stick) plus 3 tablespoons unsalted butter
1 teaspoon dried crushed red pepper
1 large garlic clove, minced
1/2 cup (packed) golden brown sugar
1/2 cup fresh lime juice
1/2 cup soy sauce
2 teaspoons cornstarch dissolved in 2 teaspoons water
8 7-ounce salmon fillets
2 6-ounce bags baby spinach
Preparation
reheat oven to 400°F. Melt 1/2 cup butter in heavy large saucepan over medium heat. Add crushed red pepper and garlic and stir until fragrant, about 1 minute. Add sugar; whisk until mixture is melted and smooth and begins to bubble, about 4 minutes. Whisk in lime juice and soy sauce. Increase heat and boil until reduced to 1 1/2 cups, about 2 minutes. Add cornstarch mixture and boil until thick, about 3 minutes. Set sauce aside.
Melt 1 tablespoon butter in heavy large skillet over high heat. Working in batches, cook salmon until golden brown, about 2 minutes per side. Transfer to baking sheet. Spoon 1 tablespoon sauce over each fillet. Roast until fish is opaque in center, about 5 minutes.
Melt remaining 2 tablespoons butter in large pot over medium-high heat. Add spinach and toss until wilted but still bright green, about 3 minutes. Season to taste with salt and pepper. Using tongs, divide spinach among 8 plates. Top each with salmon fillet; drizzle with remaining sauce and serve.
Not sure about this recipe - it is okay but not really sure about using that much butter but I also substituting the sugar with palm sugar (thought that it might be more fragrant)Did not used the spinach.
Subscribe to:
Posts (Atom)
